The Biology Laboratory

The Biology Laboratory
The Biology Laboratory
Describe the biology laboratory
A biology laboratory has:
- Large windows and big space to allow enough air and light for better ventilation and visibility respectively.
- Shelves – for keeping chemicals, specimens, apparatus and models.
- Supply of gas, electricity and water
- Working benches
- An emergence door in case of danger occurs.
- Preparation room
The biology laboratory rules
Biology laboratory has sophisticated instruments which need to be handled with special care. Chemicals which are being used are potentially harmful and they need a special attention when working with them.
The following laboratory rules should be adhered to:
- Don’t enter in the laboratory without permission from the teacher or laboratory technician.
- Do not play, or run unnecessarily in the laboratory.
- Do not eat or drink in the laboratory.
- Do not use chemicals or handle apparatus or specimens without instruction from the teacher or laboratory technician.
- Any accident or damage of apparatus must be reported.
- Label chemicals and specimens to avoid confusion.
- Always keep flammable substances away from flames.
- Turn off water and gas taps after use.
- Never point the open end of the test tube to your fellow or yourself when heating.
- Never smell substances, specimens, chemicals or gases directly.
- Wash your hands with soap after the experiment.
- Clean the apparatus and benches after the experiment.
- Return the apparatus and chemicals to their normal position after use.
The Difference between the Biology Laboratory from other School Facilities
Distinguish the biology laboratory from other school facilities
Difference between biology laboratory and other school facilities:
- Dissecting kits
- Models of different organs and systems
- Refrigerators and ovens for storing and drying specimens
- Animal keeping units
- Chemicals designed for biological experiments
- Preserved specimens of living things
- Gases, electricity and water supply.
Aim: To differentiate biology laboratory from other school laboratories or facilities
Procedure: let students visit the chemistry laboratory, physics laboratory, the school library, classroom and school store and allow them to perform the following.
- Make a list of items that are found in each of the above named areas.
- Compare the list with those which are found in the biology laboratory.
- Construct a table of differences showing a list of items which are found in the biology laboratory and those which are found in the above named school facilities as shown below.
- List items which are found in both the biology laboratory and other school facilities listed above and compare the differences.
| Facility / Building | Items |
| Biology laboratory | |
| Chemistry laboratory | |
| Physics laboratory | |
| School library | |
| Classroom | |
| School store |
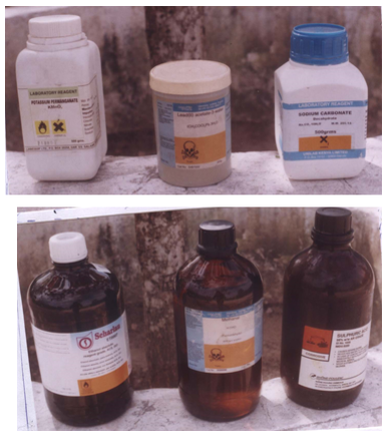
Interpretation of Warning Signs on Containers of Laboratory Chemicals and Apparatus
Interpret warning signs on containers of laboratory chemicals and apparatus
Warning signs on laboratory chemicals and apparatus
Some of the chemicals and apparatus used in biology laboratory may be harmful or dangerous. Before starting using any chemical you must know whether the chemical is toxic, flammable, oxidizing, explosive or irritant/harmful. To help you recognize such dangerous substances, the containers of modern chemicals carry special chemical warning signs as indicated below.
Toxic
Toxic substances can cause death. They may be poisonous when swallowed, breathed in or absorbed through the skin. Examples of toxic substances include acids and alkalis, lead II acetate and potassium dichromate.
The symbol for toxic substances is represented as shown above.
Flammable
Flammable substances are substances which can catch fire easily. Examples of such substances include petrol, alcohol, Thomas Baker (Phosphorus yellow or phosphorus red) and potassium metal. These substances normally evaporate fast and therefore should not be brought near open flames. The symbol is as indicated above.

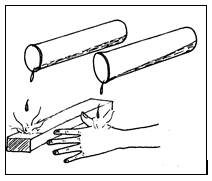
Corrosive
Corrosive substances attack and destroy living tissues. They may destroy the floor, desks as well as metals, examples of corrosive substances are concentrated acids, e.g. sulphuric acid, hydrochloric acid, nitric acid and concentrated alkalis e.g. sodium, potassium and ammonium hydroxides. If by accident a corrosive substance comes into contact with your skin, go to the sink and wash with a lot of water. The symbol is shown above.
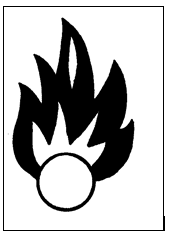
Oxidant
An oxidant is a chemical or substance which accelerates burning. Small fires can be made big in the presence of oxidizing agent. Examples of oxidizing agents include potassium permanganate, potassium chlorate, and zinc nitrate.
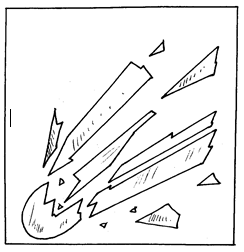
Explosive
An explosion is a forceful rapid reaction which involves random throwing of particles
Harmful or irritant
Harmful substances have a long term effect. They do not kill immediately. They have a cumulative effect. Therefore careful handling is required.
Irritant substances cause pains on the skin or eyes. They can endanger one's health if they come into contact with the skin or eyes for too long. Examples of harmful substances include lead chloride, lead nitrate, lime water ferrous sulphate and manganese (IV) oxide
Examples above of some chemical containers with their warning signs.
Activity 6
Aim: to investigate chemical warning signs Requirements:varieties of chemical containers Procedure: collect chemical containers. Observe them carefully and identify chemical warning signs on them.
Record your results as shown in the table that follows.
| Chemical container | Warning sign |
The Common Apparatus and Equipment of Biology Laboratory
Identify common apparatus and equipment of biology laboratory
Some apparatus and equipment used in the biology laboratory.
- Microscopes
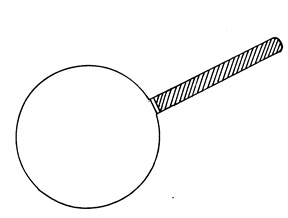
- Hand lenses
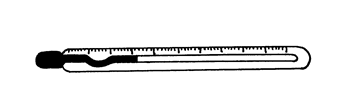
- Thermometers
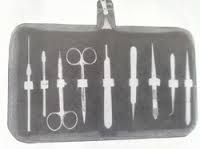
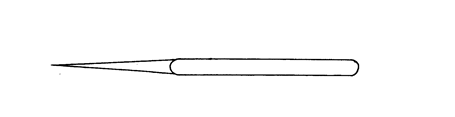
- Dissecting kits
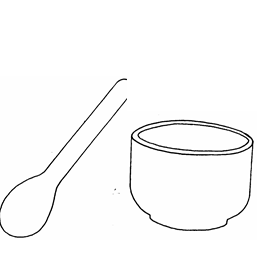
- Mortar and pestle
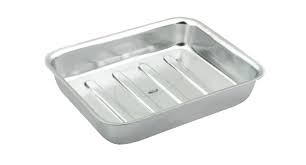
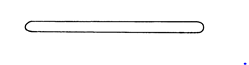
- Dissecting trays
- Delivery tubes
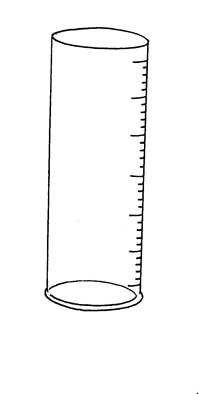
- Measuring cylinders
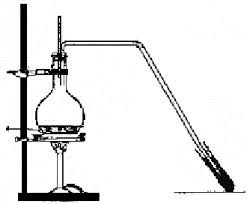
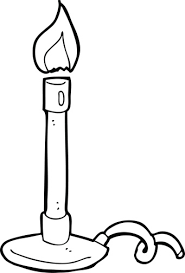
- Bunsen burners
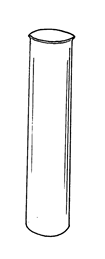
- Test tubes
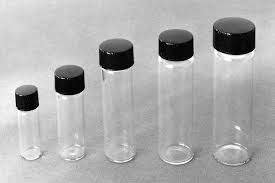
- Specimen bottles
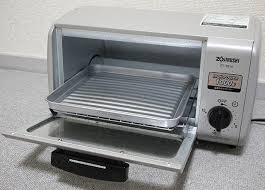
- Ovens
- A pair of scissors
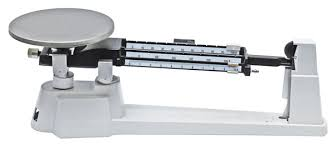
- Chemical balance
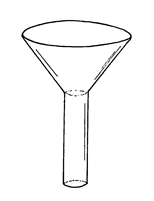
- Funnel
- Test tube racks
- Test tube holders
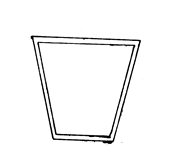
- Beakers
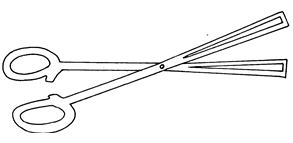
- Forceps
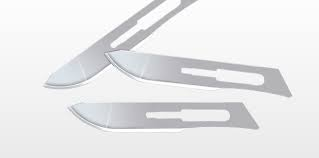
- Surgical blades
- Microscope slides
- Droppers
- Spatula
- Corks
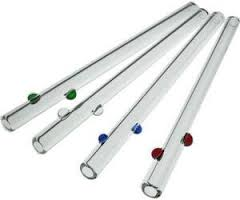
- Glass straws
- Fridge/refrigerator
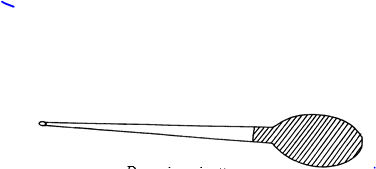
- Mounted needle
- Beam balances
- Glass rods
- Scalpels
Microscope

Thermometers
Hand lenses
Dissecting kit
Motor and Pestle
Dissecting tray
Delivery tube
Measuring cylinder
Bunsen Burner
Test tube
Specimen Bottles
Oven
Pair of scissors
Funnel
Surgical blades
Microscopic blades
Spatula
Cork
Glass straws
Mounted Needle
Beam balance
Glass rod
Scalpels

Dropping pipette
Fridge/refrigerator
Some common chemicals used in the biology laboratory
- Benedict’s solution
- Lime water (calcium hydroxide)
- Sodium hydroxide (slaked lime)
- Cobalt chloride
- Hydrochloric acid
- Copper (II) sulphate
- Sudan III
- Alcohol
- Stains e.g. carmine red, methylene blue
- Sodium bicarbonate
- Potassium permanganate
- Iodine solution
Exercise 2
In each of the following questions write TRUE for correct statement and FALSE for incorrect statement.
- A biology laboratory is a place where biological experiments are conducted……………………………….
- Everything in the laboratory can be tasted ………………
- Warning signs can help someone to avoid accident in the laboratory………………………………………………...
One of the following is not a basic quality of the biology laboratory.
- Working benches
- Large windows and big space
- Supply of gas, electricity and water
- Kitchen
Substances which may catch fire easily are said to be
- Toxic
- Flammable
- Explosive
- Irritant
An instrument used to measure temperature of the body is called
- Chemical balance
- Measuring cylinder
- Thermometer
- Barometer
One of the following is a common reagent used in the biology laboratory
- Benedict’s solution
- Potassium iodide
- Sodium acetate
- Barium chloride
Which of the following list of instruments is not related to biology laboratory?
- Fridge, a pair of scissors, surgical blades
- Microscope, test tube, thermometer
- Dissecting kit, scalpel, beaker
- Meter bridge, pendulum bob and burette.
The warning sign shown indicates
- Explosive substance
- Oxidizing agent
- Flammable substance
- Corrosive substance
Match the items in list A with the corresponding items in list B.
LIST A
- Used for placing specimen during dissection
- An apparatus used for stirring solution
- A substance which accelerates burning
- Do not play or run in the laboratory
- A common reagent in the biology laboratory
LIST B
- Laboratory rule
- Oxidant
- Sudan III
- Dissecting kit
- Glass rod
What do you understand by the following terms?
- Laboratory
- Warning sign
Draw warning signs which may be used in bottles carrying a substance which is
- toxic
- flammable
- explosive
- harmful
List down any six (6) laboratory rules
State the use of the following apparatus
- Specimen bottles
- Test tube holders
- Beam balance
- Beaker
- Mortar and pestle
Draw the following apparatus:
- Measuring cylinder
- Mortar and pestle
- Funnel
- Tripod stand.
THE MICROSCOPE
Much of the living world is too small for human eyes to see. Our eyes can only see objects that are larger than 0.1mm. Objects with sizes smaller than 0.1mm can be viewed by using microscopes.
What is a microscope?
A microscope is an instrument used for viewing objects which are too small to be seen by our naked eyes. It ranks as one of the most important tools of science.
- Physicians and biologists, for example, use microscopes to examine bacteria and blood cells.
- Material scientists and engineers use microscopes to study the crystal structures within metals and alloys (metal mixtures) and to examine computer chips and other tiny electronic devices.
There are two types of microscopes
- Compound or light microscope
- Electron microscope
Optical or light microscope
An optical microscope has one or more lenses that refract (bend) the light rays that shine through or are reflected by the specimen being observed. The refracted light rays make the specimen appear much larger than it is.
Magnifying glass is the simplest optical microscope, has only one lens. The best magnifying glasses can magnify an object by 10 to 20 times.
The compound or light microscope
The compound or light microscope uses two or more sets of lenses to provide higher magnifications. Each set of lenses functions as a unit and is referred to as lens system. In microscopes with only one objective, the lens system and ocular are mounted at opposite ends of a tube. In microscopes with two or more objectives the objectives are mounted in a rotating nose piece connecting to the end of the tube opposite the ocular. The person operating the microscope rotates the nose piece to align one of the objectives with the opening in the end of the tube.
The workings of electron and compound microscope Electron microscope – Uses electrons to illuminate the specimen and can reveal much more structures than light microscope can do.
Light microscope – Uses light to illuminate the specimen
Parts of the light microscope and their functions
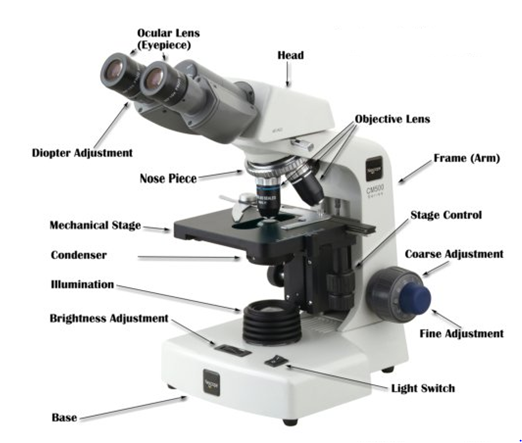
Parts of the light microscope has the following functions:
- Eyepiece – Magnify objects under observation since it consists of magnifying lenses.
- Body tube – Hollow tube attached to the arm. Its function is to hold eyepiece lens and revolving nose piece.
- Revolving nose piece – Holds objective lenses in place. Position of the objective lenses can be changed by manipulating the revolving nose piece.
- Coarse adjustment knob – It lowers and raises the body tube so that a clear image is obtained.
- Fine adjustment knob – Raises and lowers the body tube to obtain a fine focus.
- Objective lens – Brings image into focus and magnifies it.
- Stage – This is a place where specimen to be observed is placed
- Clips – Hold the slide or specimen in position
- Mirror – Reflects and directs light to the object under observation.
- Diaphragm – Is an aperture that regulates the amount of light passing through the condenser to illuminate the specimen
- Condenser – Concentrates light reflected by the mirror.
- Base or stand – Supports the microscope steadily
- Arm or limb – Supports the body tube and stage. It is used to hold the microscope
- Hinge screw – Raises and lowers the stage.
Magnification
Magnification power is symbolized by a number and abbreviation X. For example a 10X magnifying glass magnifies an object by 10 times. An object is magnified by multiplying the eyepiece lens magnification and objective lens magnification.
Example:
Magnification = eyepiece lens x objective lens magnification
= 10 × 20= X200
A table of magnification
| Eye piece lens magnification | Objective lens magnification | Total magnification |
| 5 | 20 | X100 |
| 10 | 20 | X200 |
| 15 | 10 | X150 |
| 10 | 25 | X250 |
| 20 | 20 | X400 |
How to use a microscope
- Turn on your microscope light
- Turn the nose piece so that the small (low power) objective lens clicks into place. Always start with low power lens in place.
- Place the prepared slide on the center of the stage under the clips so that the object is in the center of the opening. Make sure the cover slip is on top
- With your eye at stage level, use the coarse adjustment to bring the object and the low power objective lens as near to each other as possible. The objective lens should not touch the cover slip
- Now with your eye to the eyepiece, slowly move the coarse adjustment to increase the distance between the object and the lens. Continue this until the image is focused.
- Adjust the diaphragm so that the object can be seen as clearly as possible
- To observe the object under medium and high powers, rotate the revolving nose piece to bring the next highest objective lens into position. Make sure you hear the 'click' to ensure that the objective lens is in place. Then, focus using the fine adjustment only.
Ways of handling and carrying a light microscope
- Use both hands to carry the microscope. One hand should hold the base and the other hand should hold the arm.
- Always place the microscope on the desk or table carefully and gently and never place it at the edge of the bench.
- Keep the microscope in an upright position when using liquids or when not in use.
- Keep the stage clean and dry. If any liquids are spilled on the microscope, wipe them up immediately with a piece of tissue.
- Focus with the low-power objective lens first.
- Focus by moving the lens away from the slide, that is, by increasing the working distance.
- Consult your teacher if the lenses are dirty.(viii) Consult your teacher if the adjustments do not work freely.
- When your work is completed, move the low power objective lens into place and remove your slide.
- Keep your microscope covered when it is not in use and keep your work area clean and tidy.
ELECTRON MICROSCOPE
This type of microscope uses a beam of electrons rather than a beam of light to produce magnified images. Electron wave lengths are much shorter than those of visible light. As a result electron microscopes can resolve much finer detail than light microscope can do.
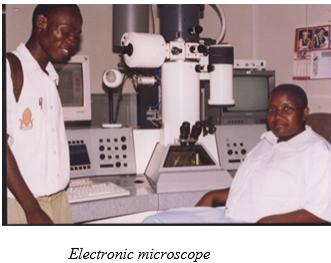
Types of electron microscopes
- Transmission electron microscope (TEM) This type of a microscope passes a broad beam of electrons through a specimen slice a few hundred angstroms thick.
- Scanning electron microscope (S E M) This microscope scans a focused beam across the surface of the specimen.
Other kinds of microscopes
Scanning probe microscope The microscope scans a specimen with a sharp point called a probe.
The ion microscope (field -ion microscope) It is used to examine metals. It creates an image of the crystal structure of the tip of an extremely sharp metal needle. An electric field applied to the tip repels charged helium, neon or argon atoms which spread out and strike a special screen. The screen glows where the atoms strike it, forming an image of the arrangement of atoms in the metal.
Exercise 3
Which kind of microscope uses electrons to illuminate the specimen?
- Electron microscope
- Metal microscope
- Light microscope
- Compound microscope
Which part of the microscope holds objective lenses?
- Clip
- Base
- Revolving nose piece
- Diaphragm
On the microscope, the eyepiece
- Holds the object to be observed
- Directs light to the object under observation
- Magnifies the object under observation
- concentrates light reflected by the mirror.
Which of the following is not part of the microscope?
- Body tube
- Condenser
- Scalpel
- Clip
Objects which cannot be seen by our naked eyes can be viewed using
- Hand lens
- Microscope
- Mirror
- Objective lens
In a microscope, if the eyepiece lens magnification reads 10 and objective lens reads 40 the total magnification will be
- X50
- X300
- X400
- X40
…………..raises and lowers the stage
- Hinge screw
- Coarse adjustment
- Fine adjustment
- Arm
Fine focus of the image can be obtained using
- Microscope
- Fine adjustment
- Condenser
- Coarse adjustment
Answer the below;
- Name two types of microscopes
- List down any five parts of the microscope
Answerthebelow;
- Draw a well labelled diagram of the light microscope
b. State the functions of each of the following parts of the microscope
- Body tube
- Mirror
- Objective lens
- Arm
- Diaphragm
State any five ways of handling and caring microscope.
Subscribe to:
Post Comments
(
Atom
)


No comments :
Post a Comment